Combining the natural elegance of stone with the vivaciousness of vegetation, rock landscaping has stood the test of time. The subject of how to landscape with rocks is crucial to producing a harmonic and visually pleasing conclusion, whether you’re just adding a rocky accent to your garden or designing a full-blown rockery. Read this post for a comprehensive guide to using landscaping pebbles to improve your outside area.
The Foundation of Rock Landscaping
Before you get your hands dirty, it’s crucial to plan. This planning phase addresses what to do with landscaping rocks and lays the groundwork for your project.
Steps to Get Started
- Designing Your Layout: Sketch a design that includes the locations for your rocks, plants, and any other features;
- Choosing the Right Rocks: Select rocks that complement your home’s exterior and fit within your landscape’s theme;
- Preparing the Site: Clear the area of weeds, debris, and if necessary, dig down to set larger rocks into the ground for stability.
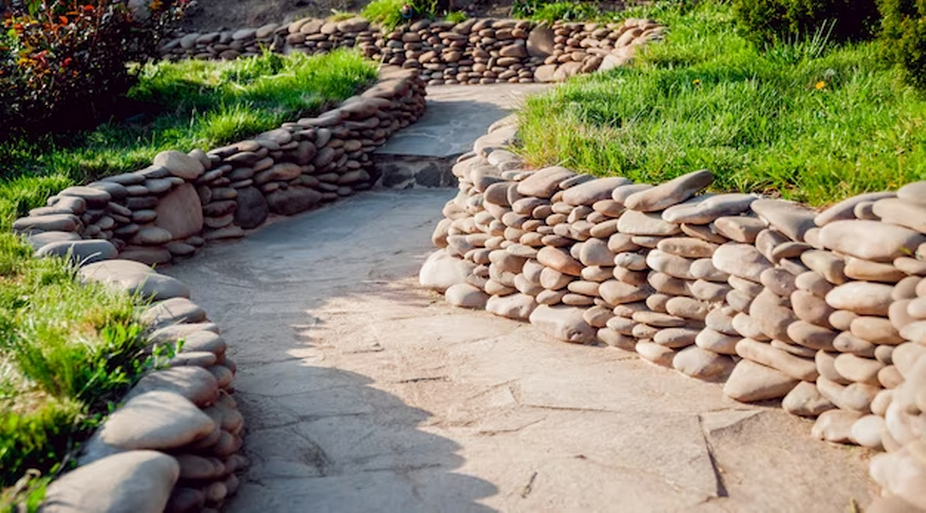
Selecting Your Stones
When considering what to do with landscaping rocks, variety is key. Use different sizes and colors to create depth and interest.
- Boulders: Serve as focal points;
- Flagstones: Ideal for pathways;
- River Rocks: Excellent for creating dry stream beds or borders;
- Gravel: Great for filling in spaces and providing a base layer.
Laying the Foundation: How Many Inches of Rock for Landscaping?
When it comes to landscaping with rocks, the depth of the rock layer plays a crucial role in both aesthetics and functionality. Whether you are creating paths, walkways, or adding rocks to your garden beds and features, understanding the appropriate depth is essential for a successful landscaping project. Let’s explore the ideal rock depths for different landscaping purposes and provide you with a step-by-step process to help you achieve the desired results.
Rock Depths for Various Landscaping Purposes
| Landscaping Purpose | Recommended Rock Depth | Notes |
| Paths and Walkways | 2-3 inches | Compacted gravel base with decorative rock. |
| Beds and Garden Features | 3-4 inches (varies) | Depends on rock size and plant requirements. |
Now, let’s delve into the step-by-step process for achieving a well-laid foundation of rocks in your landscaping project:
Step 1: Mark the Area
Before you begin placing rocks, it’s essential to outline the designated area. This helps you visualize the layout and ensures a more organized and aesthetically pleasing result. You can use chalk or string to mark the boundaries accurately.
Step 2: Excavate
Once you’ve marked the area, it’s time to excavate the topsoil to the depth required for your chosen type of rocks. The depth will depend on whether you are creating a pathway, walkway, or garden bed. For paths and walkways, excavate to a depth of 2-3 inches, while garden beds may require 3-4 inches, with some flexibility depending on your specific design and plant requirements.
Step 3: Lay Landscape Fabric
To prevent weeds from infiltrating your rock landscaping and to allow water to permeate the soil beneath, it’s crucial to lay landscape fabric over the excavated area. Landscape fabric acts as a barrier, blocking unwanted plant growth while ensuring proper drainage.
Step 4: First Layer of Gravel
For stability and enhanced drainage, spread a base layer of gravel evenly across the excavated area. This base layer provides a solid foundation for the rocks and helps prevent settling over time. Make sure to compact the gravel layer thoroughly for optimal stability.
Step 5: Position Your Rocks
Now, it’s time to start placing your rocks. Begin with the largest stones, and arrange them according to your design or aesthetic preferences. These larger rocks will serve as focal points or anchor pieces in your landscaping project.
Step 6: Add Additional Layers
After placing the largest rocks, fill in the remaining space with smaller stones. These smaller rocks help to create a more textured and visually appealing landscape. Consider the overall balance and distribution of rocks to achieve the desired look.
Step 7: Finish with Top Layer
Finally, complete your landscaping project by adding a top layer of your chosen decorative landscaping rocks. This top layer should provide the finishing touch and enhance the overall aesthetics of your landscaping design.
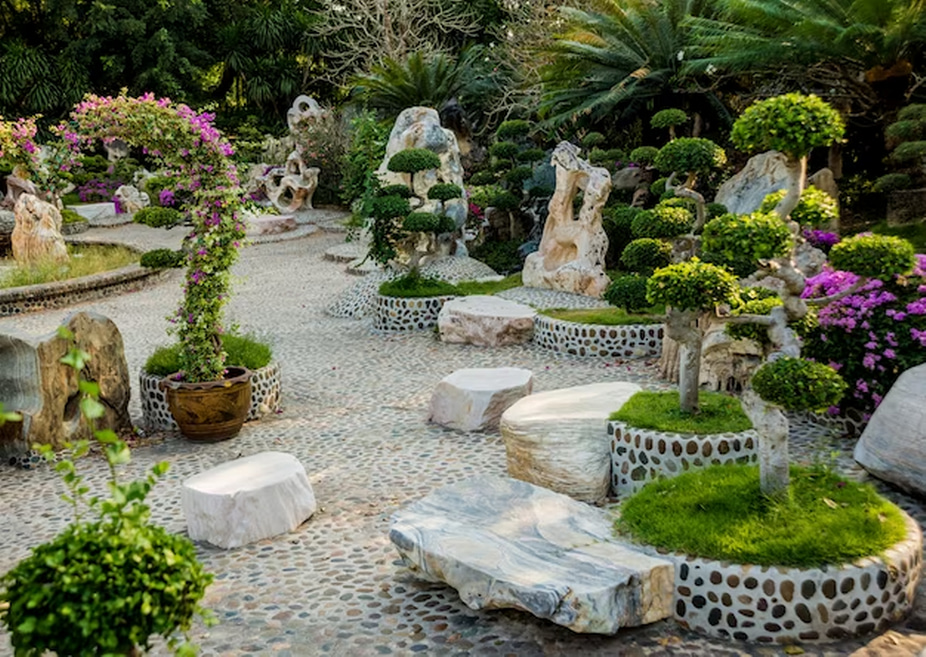
Practical and Creative Uses of Rocks in Landscaping
With an understanding of how to do landscaping with rocks, let’s delve into practical and creative uses:
- Creating a Rock Garden: Combine rocks with alpine plants for a stunning rock garden;
- Building a Retaining Wall: Use larger stones for functional and aesthetic retaining walls;
- Forming a Water Feature: Rocks are perfect for creating natural-looking waterfalls or ponds;
- Developing a Zen Garden: Arrange rocks mindfully in sand or fine gravel to promote tranquility.
Maintenance: How to Store Landscaping Rocks
When not in use, proper storage of landscaping rocks is vital to maintain their appearance and prevent them from becoming a home for pests.
- Keep Dry: Store in a dry place to avoid algae or moss growth;
- Cover: Use a breathable fabric to protect from dust and dirt;
- Elevate: Place rocks on pallets to avoid contact with the soil.
Adding Plants: The Perfect Companions for Your Rocks
Integrating plants into your rock landscape brings life and color. Consider these pairings:
- Succulents and Cacti: Thrive in the same conditions as many landscaping rocks;
- Perennial Shrubs: Dwarf varieties complement rock features without overwhelming them;
- Ground Covers: Creeping plants can soften the hard edges of rocks.
Conclusion
Rock landscaping is an art form that marries the natural strength of stone with the delicate beauty of your garden. Knowing how to do landscaping with rocks is not just about placing stones strategically; it’s about crafting a landscape that stands the test of time, is sustainable, and brings a sense of serenity and natural beauty to your outdoor space. Whether you are planning a cozy garden corner or a grand rockery, remember to respect the scale, choose the right stones, and integrate plant life for a dynamic and textured outcome.
FAQs
Q: How do I choose the right size rocks for my landscape?
A: Consider the scale of your garden. Larger areas can accommodate boulders, while small gardens may benefit from gravel and smaller stones for balance.
Q: Can I use landscaping rocks to improve drainage?
A: Absolutely. River rocks and gravel can facilitate better drainage, especially in garden beds.
Q: How often should I replace the rocks in my landscape?
A: With minimal weathering, rocks can last many years. Refresh the top layer as needed to maintain the aesthetic.
Q: Are there plants that shouldn’t be used with landscaping rocks?
A: Plants that require a lot of water or have invasive root systems might not be suitable companions for rock landscaping.
Q: How to prevent landscaping rocks from sinking into the ground?
A: Use a sturdy landscape fabric underneath and ensure you have a solid base of gravel.
